How to Set Up Your First Retargeting Advertising Campaign in 30 Minutes

The benefits behind retargeting advertising are pretty obvious and we see more and more advertisers starting to take advantage of this channel. Now, perhaps you read about how great retargeting can be for your business but you’re not sure how to get started. It all just seems a bit too complicated to setup or even too good to be true.
That’s why today I want to walk you through all the steps needed to launch your first ever retargeting advertising campaign. We will use Adroll for our example but there are plenty of companies out there that can help you do retargeting. The steps to setup a campaign will be very similar anyway.
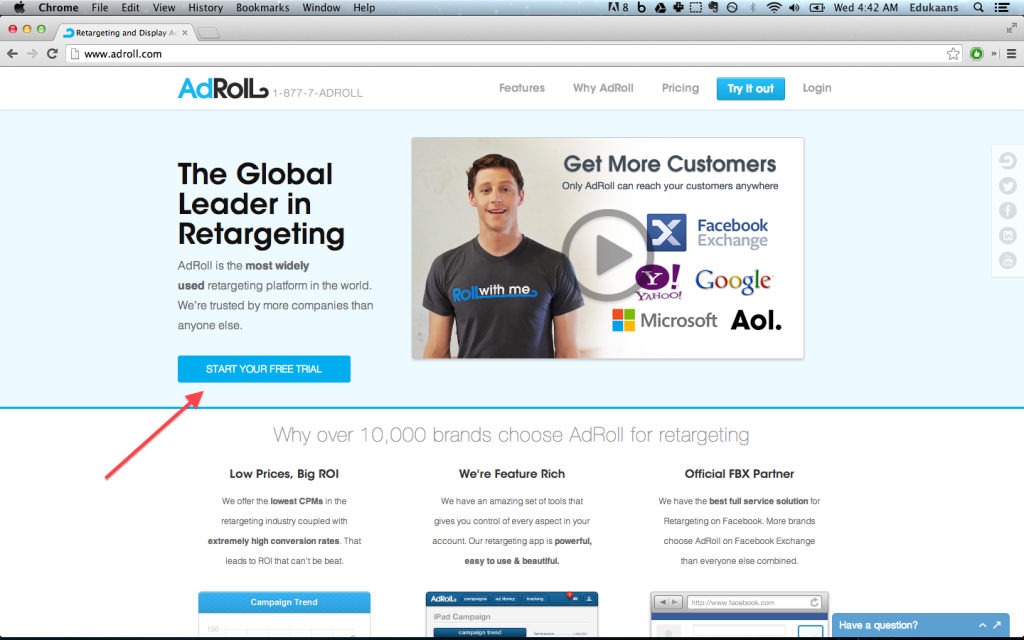
First, let’s start by visiting www.adroll.com and click the “Start Your Free Trial” button in the middle of the page. Adroll is great because they give you around $60 worth of free advertising to get started with. You can run your first campaign for free basically and see if it works for you.
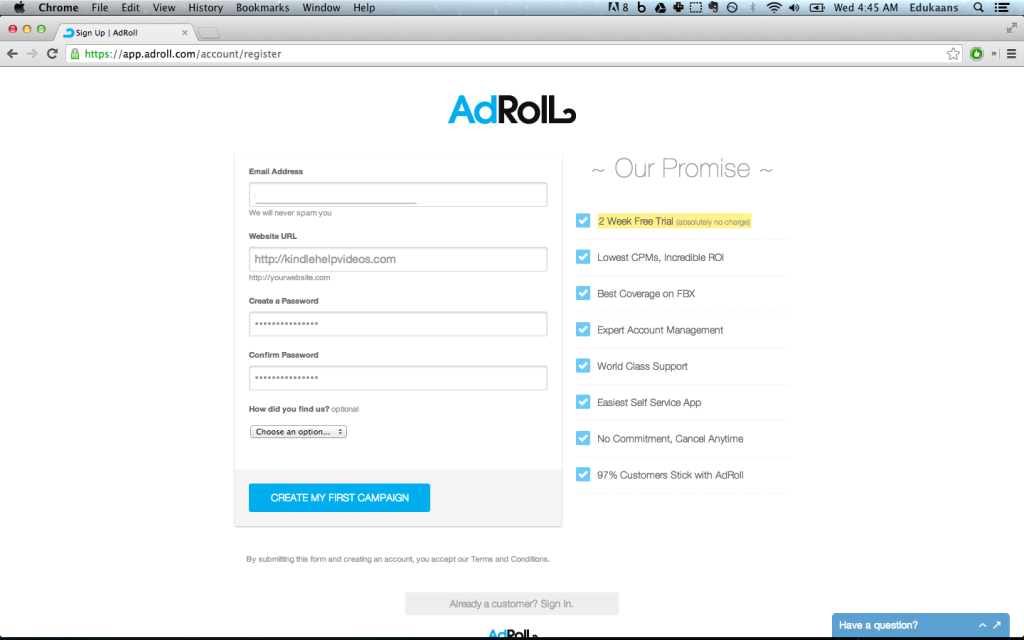
Add your business details to create your account. Once you’re done, submit your information.
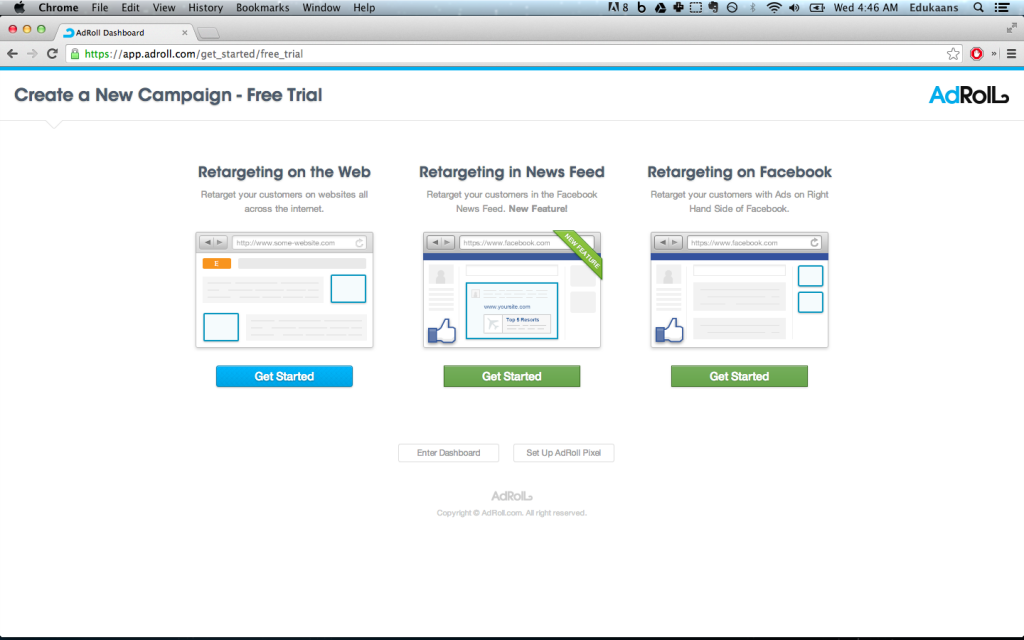
You will be greeted with a few options. Adroll offers 3 ways to target your customers:
- Through your website
- Facebook Newsfeed
- Facebook Ads (on the right hand side)
For our example, let’s choose “Retargeting on the Web”. This is the most simple setup and you can always experiment with their Facebook options.
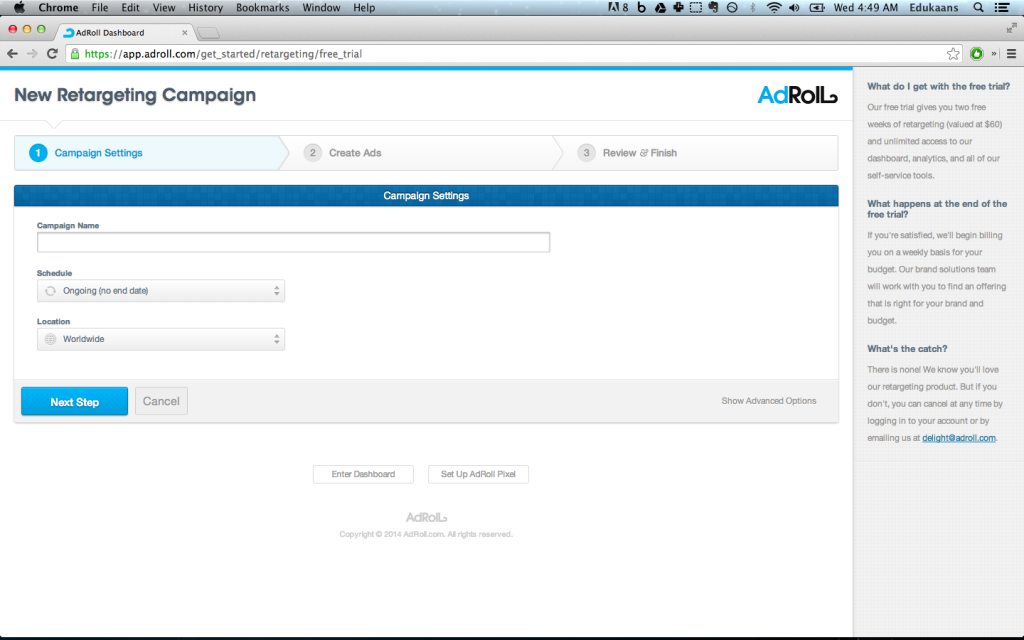
Next, we can start creating our first campaign. Start by entering a title for your campaign and then leaving the schedule to “Ongoing”. You can always change this later on. If your customers are mostly based in a specific country, then narrow down your location. Once you’re done, click “Next Step”.
Now this is probably the hardest step of all. You need to upload the ads that will be displayed when your customers are targeted. Some things to think about when you create the images for your ads:
- What action do I want my customers to take after they click my ad? Perhaps you are targeting only people who left your site with items still in their shopping cart. In this case, you want them to come back and checkout.
- What image can I use to remind my customers of my store or products? This could be your logo or perhaps it could one of your most popular products.
- How can I design an ad that could be done in multiple sizes or formats? Adroll supports many sizes such as long vertical banners (160×600 pixels) and long horizontal banners (728×90). You should probably look into creating an ad that could be shuffled around into multiple sizes.
Remember that you want to get started quickly so don’t get bogged down in this step. Even the most basic ad can help you test out retargeting advertising. Also take a few minutes to read over the creative guidelines that your ad must adhere to: http://support.adroll.com/creative-requirements/. The guidelines are pretty obvious but its always good to be careful not their break their rules.
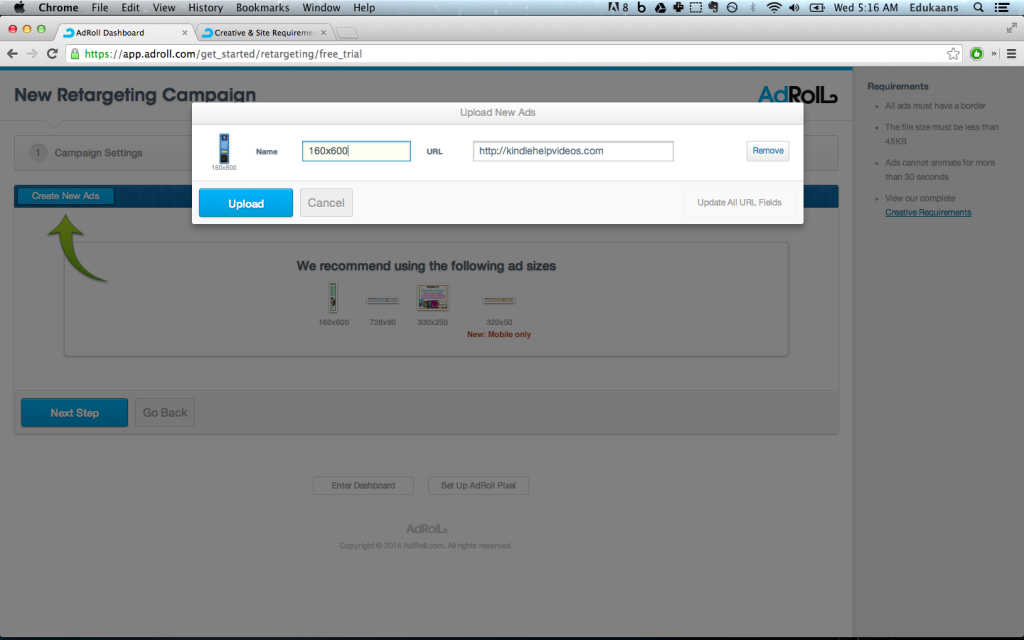
Once you have your images ready, click the “Create New Ads” button to upload them. You will need to give each image a name and a link where your customers should be taken to after they click your ad. Click “Next Step” once you are done uploading all your images.
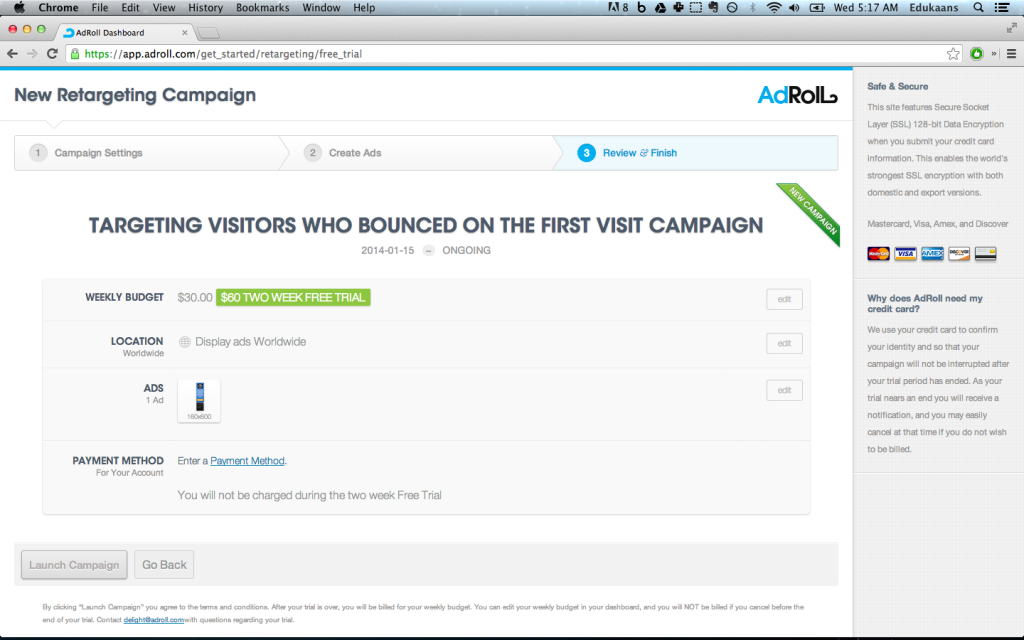
In the next screen, you can confirm that all the settings are correct. You will also need to enter a payment method but you shouldn’t be charged during the first two weeks or until your $60 free trial balance is spent. Once you complete that, click “Launch Campaign”.
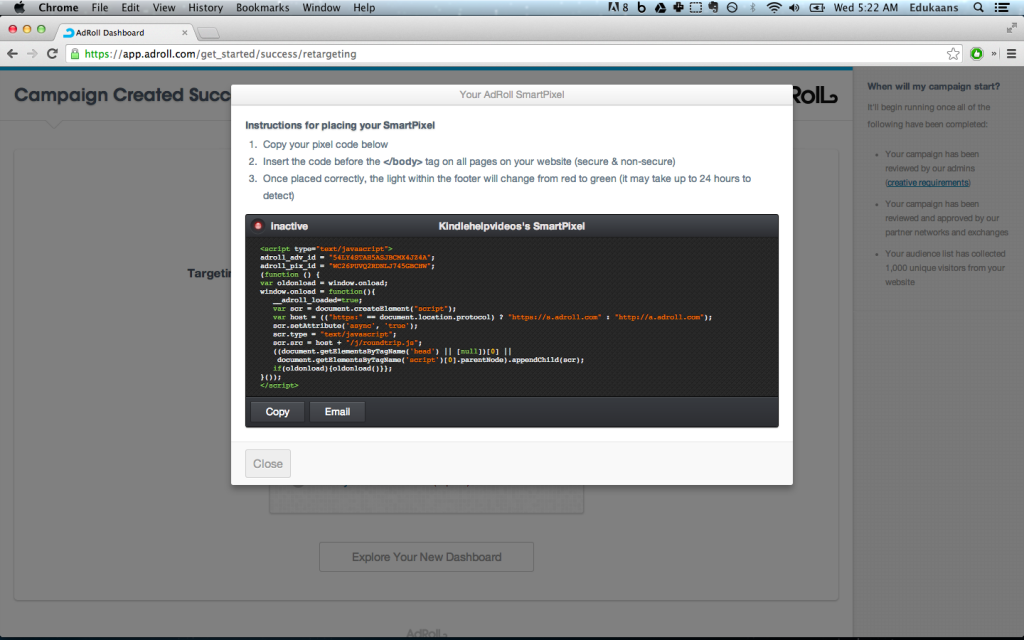
Great! You’re almost there. The Adroll staff will now review your site and make sure that everything is ok. In the meantime, we need to complete the last step: Add the “Adroll Pixel” on your site. This is what lets Adroll tag people as they come to your site and later target them as they visit other sites. Click the “Place Your Adroll Pixel” link to open up a pop up window.
Now there are several ways of adding this code to your site. If you have a developer or someone who manages your website for you, simply forward them the code and ask them to place it before the last HTML </body> tag. If you use WordPress, you can use the following plugin: http://wordpress.org/plugins/adroll-retargeting/
The plugin will ask you for your “adv_id” and the “pix_id”. You can find these 2 numbers in the second and third line from the adroll code. Once you add the code to your site, give it a little bit of time until your Adroll dashboard updates. Eventually, your pixel will be setup properly and your campaign will be approved by Adroll.
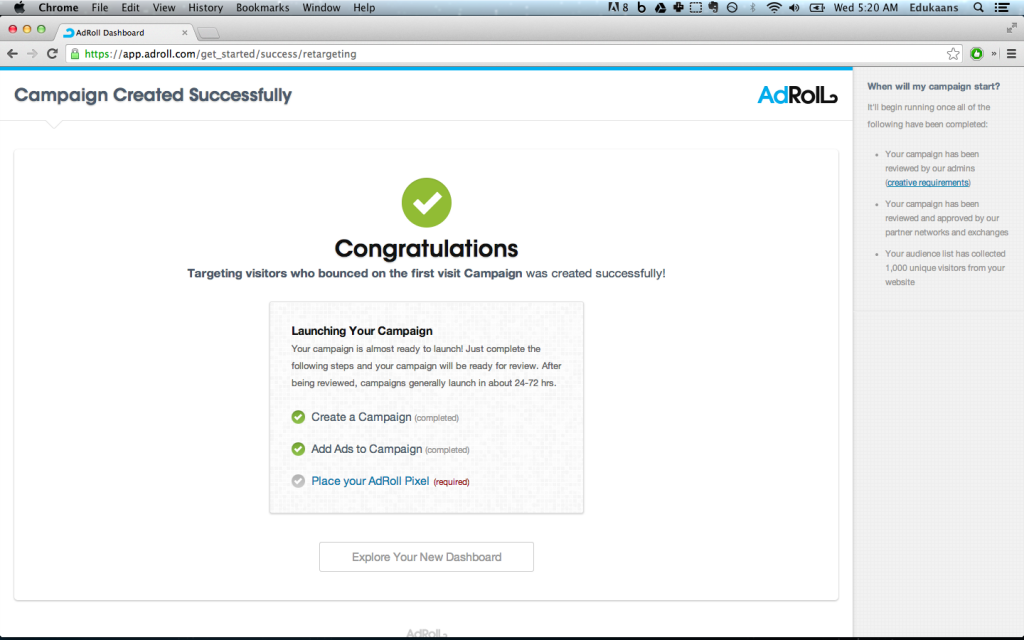
Congratulations! You have now setup your first ever retargeting advertising campaign. It might take a few tweaks to get it performing for your business but hopefully you see some of the benefits that has retailers excited about.
Tagged cart abandonment
Image by: Simon Shek. Licensed under CC BY 2.0.


